In this guide, you'll learn what a Reply Agent is, how to configure it, how to write an effective prompt, and how to connect an AI provider to automate replies across email and LinkedIn.
What Is a Reply Agent (and What It's Not)
A Reply Agent is an AI-powered automation feature in Master Inbox that drafts or sends context-aware replies to prospect messages based on configurable tone, rules, AI models, and selected communication channels.
It can:
Auto-send replies (Fully Automated mode)
Draft replies for approval (Human-in-the-Loop mode)
Handle follow-ups
Respond to objections
Continue existing conversations
Operate across selected channels (Email, LinkedIn, etc.)
This is not creating a brand-new AI. You are connecting an existing AI model (like OpenAI) into your workspace. You control how it replies, when it replies, and where it replies.
Think of the Reply Agent as your AI teammate that follows your instructions exactly.
Why Use a Reply Agent?
Speed and Coverage
Respond faster to inbound replies and never miss a follow-up, even at high volume.
Consistency
Keep tone and messaging consistent across every reply, every channel, every team member.
Efficiency
Handle common objections and routine responses automatically. Save hours of manual replying.
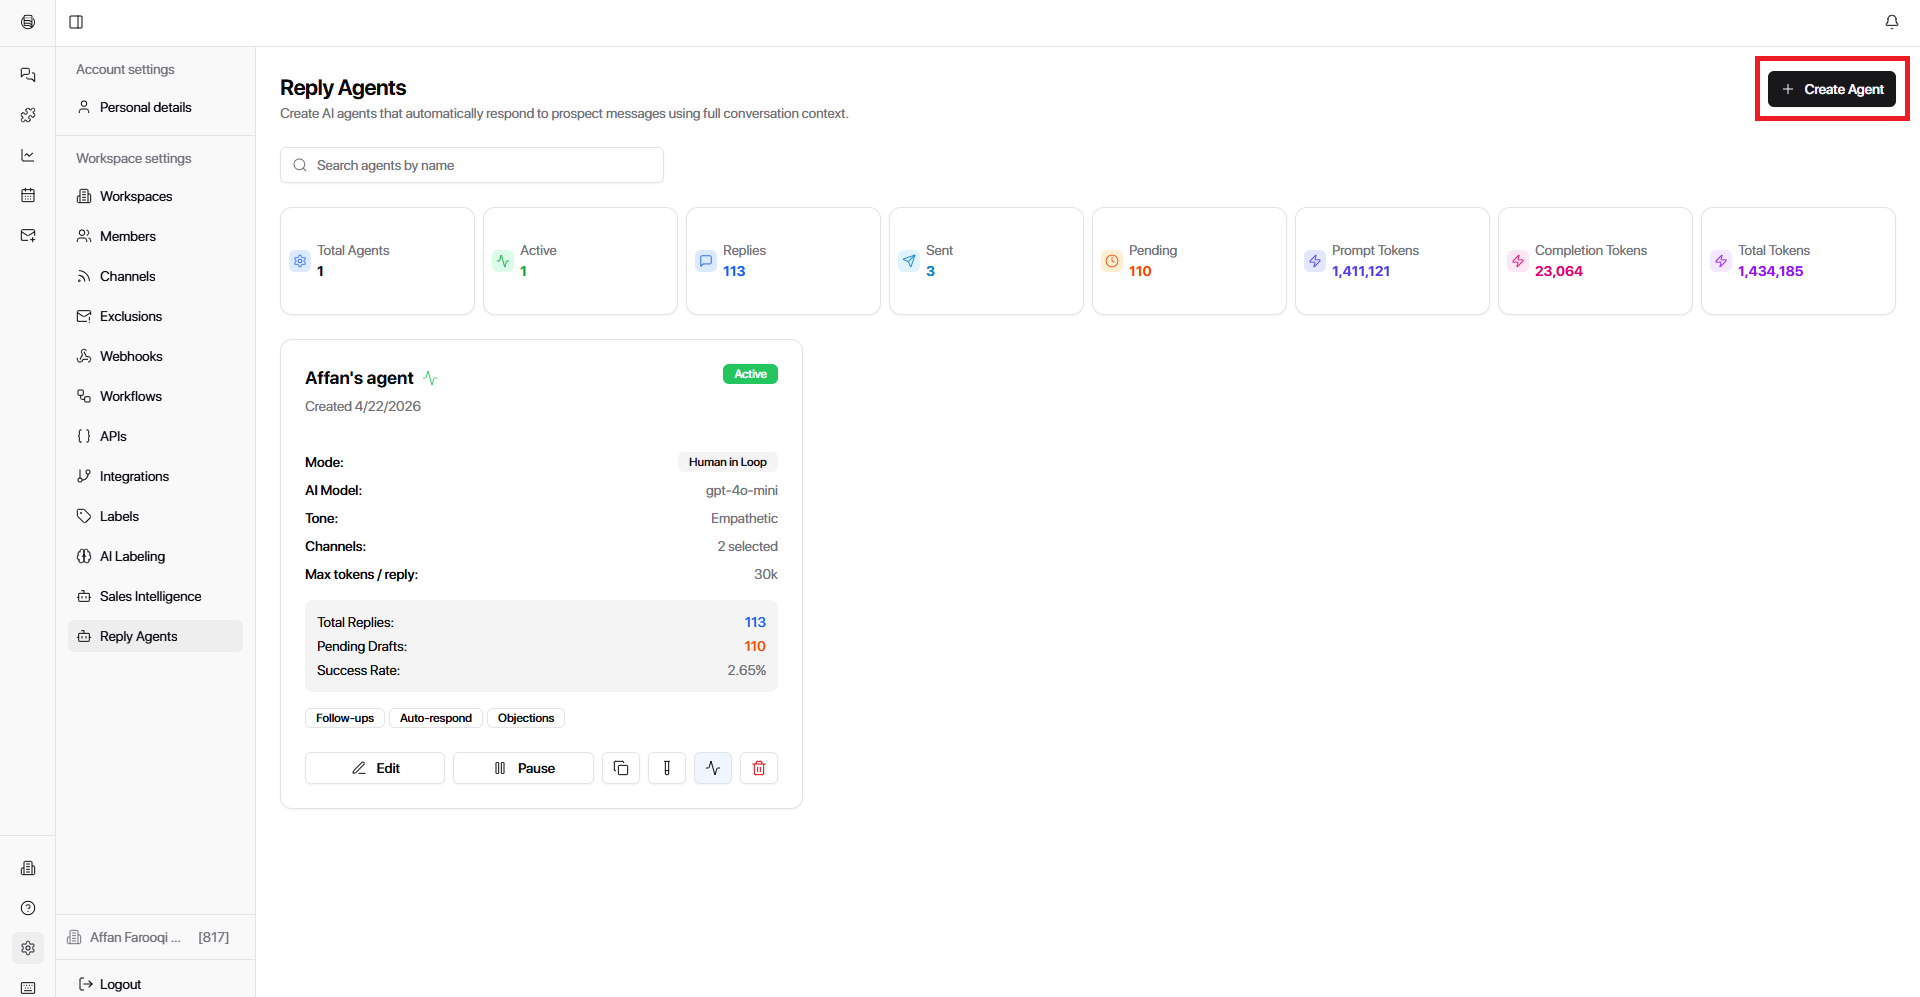
Step 1: Navigate to Reply Agents
Go to Settings → Reply Agents → Create Agent.
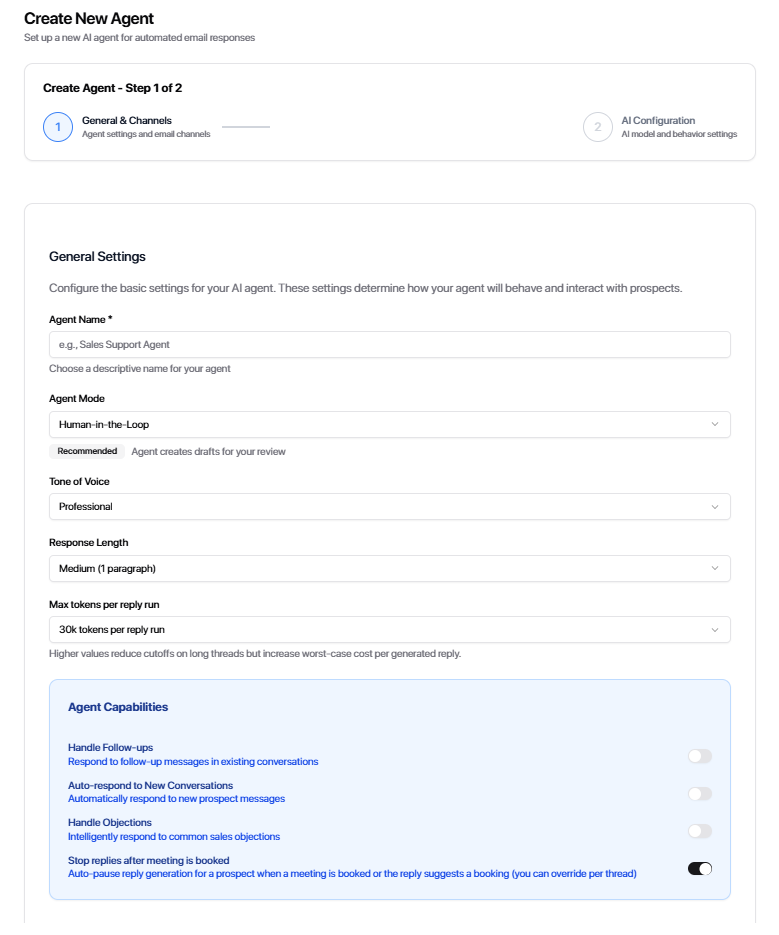
Step 2: General Settings
Set up the core behavior of your agent:
Agent Name
Give your agent a clear name. Example: Inbound Sales Reply Agent
Agent Mode
Choose how the agent operates:
Human in the Loop — The agent drafts replies, but a human reviews and sends them. Best for teams that want control and approval before anything goes out.
Fully Automated — The agent sends replies automatically without review. Best for high-volume inbound or handling common, predictable responses.
Tone
Select the communication style for your agent's replies. This shapes the personality of every message.
Response Length
Choose how long replies should be:
Short
Medium
Long
This controls how detailed the agent's replies are.
Agent Capabilities
Toggle what the agent is allowed to do. Enable only what you are comfortable automating.
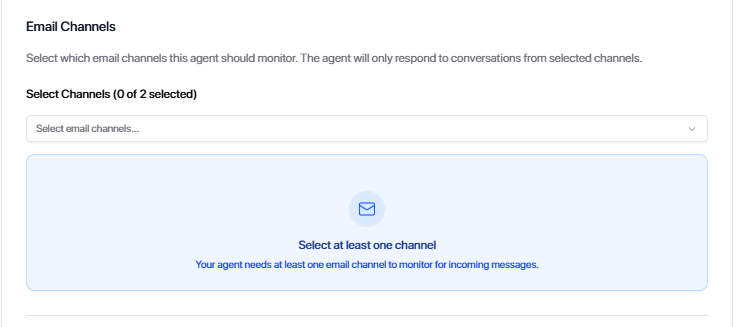
Step 3: Email / Channel Settings
Select which channels the agent should monitor.
Example:
Email
LinkedIn
The agent will only respond to conversations inside selected channels.
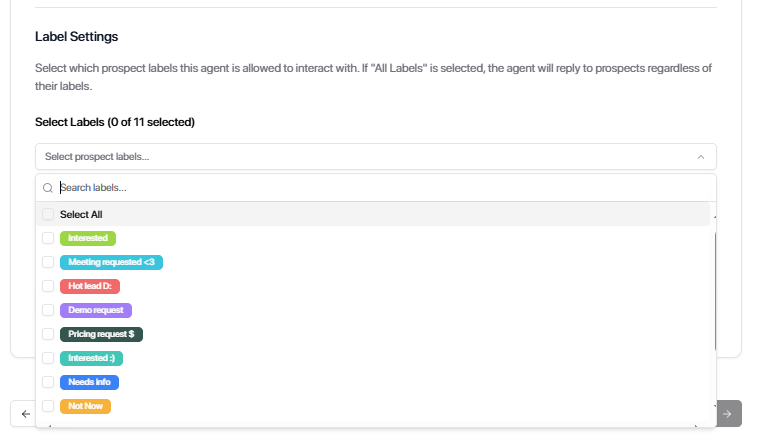
Step 4: Label Settings
Choose which prospect labels the agent can interact with.
If all labels are selected, the agent will respond to all prospects regardless of label. Use this to control which conversations the agent engages with based on your existing labeling system.
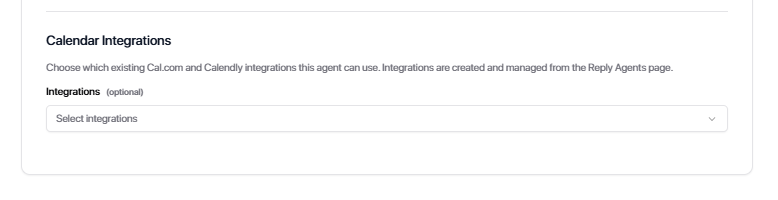
Step 5: Calendar Integration
You can connect a calendar integration to enable automatic meeting booking and availability detection inside replies.
Select your provider (Cal.com or Calendly)
Connect your account
The agent automatically adjusts suggested meeting times based on the prospect's timezone, ensuring availability is relevant and accurate
You will need to Integrate your cal.com account to Master Inbox first in order to set up an integration in your reply agent. Visit Cal.com Integration for guidance.
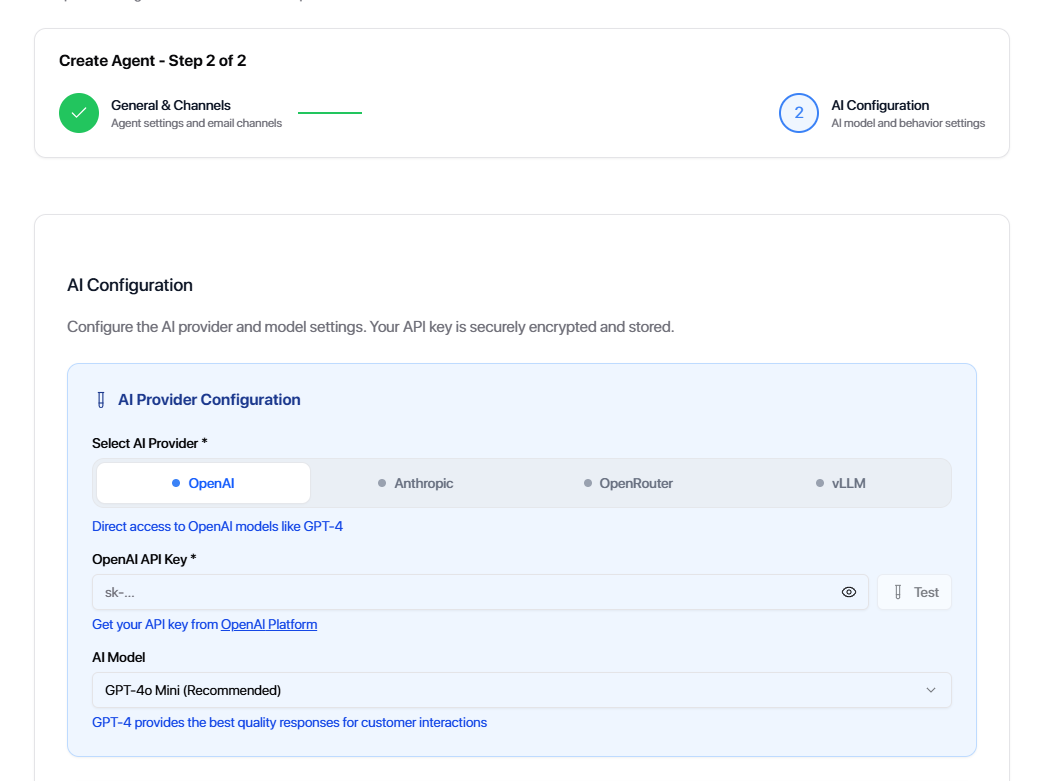
Step 6: AI Configuration
After setting up general and channel settings, configure the AI that powers your agent.
Select AI Provider
Choose your AI provider:
Insert the API Key
Select AI Mode
We recommend: GPT-4o Mini
It offers the best balance of speed, cost, and quality for replies.
Adjust Creativity
Control how creative the replies should be:
Low → More direct, factual replies
High → More conversational and flexible replies
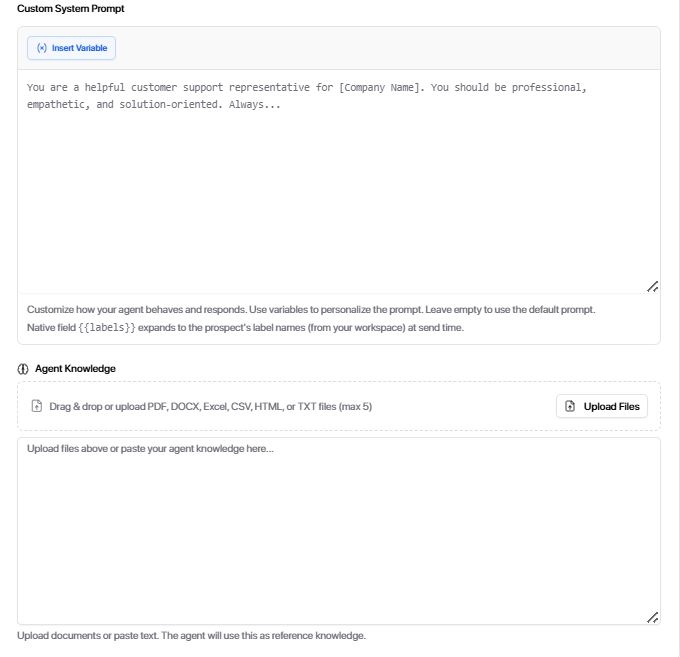
Advanced Settings: Custom System Prompt & Agent Knowledge
Under Advanced Settings, you'll see two sections:
Custom System Prompt Define the agent's role, responsibilities, tone, and behavior rules. This is the instruction manual for how the agent should think and respond.
Agent Knowledge Provide context about your company, product, ideal customers, and outcomes. The agent uses this to answer questions and sound like an expert on your offer.
What to Include in Your Custom System Prompt
1. Role Definition
Tell the agent who it is and what it represents.
Role Title — What position does the agent hold? (e.g., BDR, SDR, Agency Owner)
Company Name — What company is the agent representing?
Primary Responsibility — What should replies achieve? (e.g., qualify leads, book meetings, answer questions)
Define who counts as a qualified prospect. The agent will only push for a call-to-action when these conditions are met.
What makes someone a good fit?
What signals should the agent look for?
The agent will hold back on booking requests if the prospect doesn't meet your qualification criteria.
3. Disqualification Rules
Set clear conditions for when the agent should stop pursuing a lead.
Who should the agent not engage?
What should it do instead? (e.g., politely decline, redirect to support, unsubscribe)
4. Intent-Based Reply Handling
Define how the agent responds based on the prospect's intent.
Interested — How should the agent respond? What's the next step?
Not Interested — Should it soft close, keep the door open, or acknowledge and move on?
Asking for Info — How should it answer questions without over-explaining?
Confused / Vague — How should it handle one-word replies like "?", "ok", or "tell me more"?
5. Objection Handling
Give the agent clear responses to common objections.
Price Objection — How should it respond when prospects push back on cost?
Competitor Objection — What if they mention a competitor?
General Hesitation — How should it address uncertainty or delays?
6. Call-to-Action (CTA) Rules
Control when and how the agent asks for a next step.
Primary CTA — What action do you want? (e.g., book a call, schedule a demo, reply with availability)
When to push CTA — What signals indicate the prospect is ready?
When NOT to push CTA — When should the agent hold back and continue the conversation instead?
7. Tone & Style
Shape the personality of every reply.
Tone — Professional, friendly, casual, direct?
Style — Short, conversational, straight to the point?
Avoid — Phrases or words to never use
Emojis — Allowed or not?
8. Formatting Rules
Control the look and length of replies.
Max reply length — Keep it tight (e.g., 50–100 words)
Signature — Add a sign-off if needed
9. Booking Logic
Define how meetings should be handled.
Suggest specific times, send a booking link, or ask for availability?
What type of meeting? (Call, Demo, In-person)
When to send the booking link vs. when to hold back?
10. Pricing Handling
Decide how the agent responds to pricing questions.
Do not share pricing, share a starting range, ask questions first, or redirect to a call?
Any additional notes on how to handle cost conversations?
11. Do / Don't Rules
Set hard boundaries for agent behavior.
DO — Actions the agent should always take
DON'T — Actions the agent should never do
12. Snippets (Optional)
Predefine replies to specific phrases or objections.
If the prospect says X, reply with Y
Use this for common questions or objections you want answered a specific way every time.
Use Calendar in Custom System Prompt
After connecting the calendar, you can enable the agent to use it inside the Custom System Prompt.
instruct the agent to:
Check availability
Suggest meeting times
Book meetings based on calendar slots
Example Prompt Instruction
The agent should check available calendar slots and suggest two available meeting times when the prospect shows interest in booking a call. It should prioritize clarity and make booking as easy as possible.
Example Reply Format
When the agent suggests times, it should use this format:
Would either of these work for you?
Tuesday 3:00 PM ET
Wednesday 11:30 AM ET
Or you can book directly here: [your booking link]
Best Practices
Always provide 2 clear time options first
Only send the booking link after presenting options
Ensure times are pulled from real calendar availability
Keep the message short and easy to scan
What to Include in Agent Knowledge
1. Company & Offer
Give the agent a clear understanding of what you do.
What does your company do?
What product or service do you offer?
Who is it for?
2. Core Benefits
List the main value propositions.
What are the top 3 benefits or outcomes?
The agent will lean on these when explaining value or handling objections.
3. Not a Fit Customers
Be explicit about who you don't serve.
Who should not be targeted or engaged?
This helps the agent recognize mismatched prospects and avoid wasting time on unqualified conversations.
4. How It Works
Explain your process in simple steps.
What happens after someone signs up or books a call?
Break it into 3–5 clear steps the agent can reference
5. Core Outcome / Result
Define the main result your service delivers.
What's the primary outcome?
What are secondary results?
The agent uses this to frame conversations around outcomes, not features.
6. Target Customer Profile
Define who the ideal customer is.
Ideal customers — Who gets the most value?
Non-fit customers — Who should the agent deprioritize?
This helps the agent recognize whether a prospect is worth pursuing.
7. Upload Documents (Optional)
You can upload documents such as PDFs, CSVs, or text files to give the agent additional context. The agent will use this information when generating replies, helping it answer questions more accurately and with deeper context
Fill out both sections completely. The more context you give, the more accurately the agent will represent your brand and handle conversations.
Example Agent Roles
BDR Reply Agent Role
Business Development Representative at MasterInbox. Objective: Reply to inbound messages and qualify leads. Responsibilities: Build trust, understand the prospect's use case, ask 1–2 qualifying questions, move qualified conversations forward. Tone: Professional and friendly. Clear and concise. Not pushy. Guidelines: Keep replies short. Focus on discovery, not pitching. Understand intent before booking a call.
SDR Reply Agent Role
Sales Development Representative at MasterInbox. Objective: Convert inbound interest into booked meetings. Responsibilities: Respond quickly, address basic objections, guide conversations toward a call. Tone: Conversational and confident. Direct but polite. Action-oriented. Guidelines: Keep replies brief. Use a clear next step when interest is shown. Do not over-explain.
Agency Owner Reply Agent Role
Agency Owner at MasterInbox. Objective: Reply to inbound leads and potential partners. Responsibilities: Build authority and trust, explain value at a high level, qualify serious opportunities, move toward a call or next step. Tone: Professional and confident. Clear and calm. Strategic, not salesy. Guidelines: Focus on outcomes, not features. Keep replies short and intentional. Avoid unnecessary detail.
Step 7: Save Your Agent
Click Save.
Your Reply Agent is now created and ready. It will only operate on the channels you selected, following the prompt and settings you configured, nothing outside of what you defined.
Clone a Reply Agent
You can clone an existing reply agent to quickly reuse its setup for different channels or labels.
Step 1: Open Reply Agents
Go to Settings
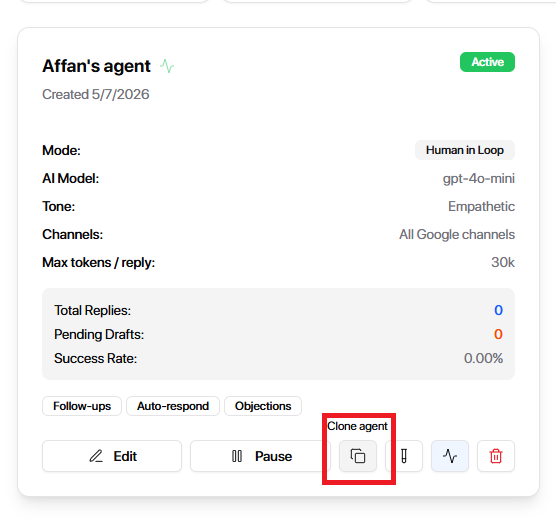
Open Reply Agents and find the agent you want to clone
Click Clone Agent
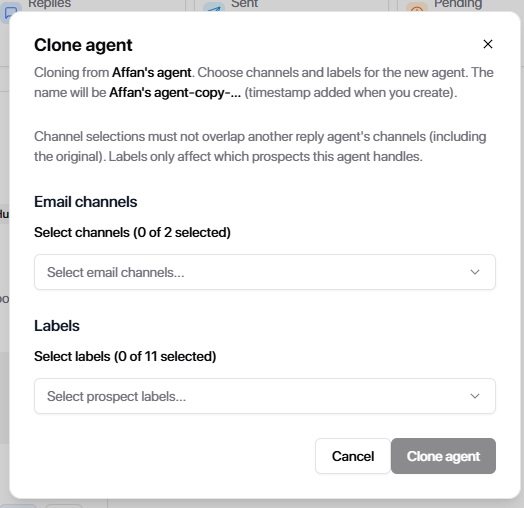
Step 2: Configure the New Agent
When cloning an agent, you'll choose:
Channel Selection
Select which channels the new cloned agent should handle.
You can:
Select all channels
Or selectively choose specific channels
Channels selected for the cloned agent must not overlap with channels already used by another reply agent, including the original agent.
Label Selection
Choose which labels this cloned agent should handle.
You can again:
Select all labels
Or manually pick specific labels
Labels only affect which prospects this agent handles.
The cloned agent name will automatically be created as: [Original Agent Name] Copy + Timestamp
You can rename it to your choice by editing General Settings → Agent Name after cloning.
The cloned agent cannot use the same channel and label combination as another existing reply agent.
If you try to do this, you'll see this error:
"Failed to create agent. Another reply agent already targets the same channel and label combination."
How to Successfully Clone an Agent
To avoid conflicts:
Select channels that are not already used by the original agent
Select labels that are different from the original agent's labels
Once done:
Click Clone Agent
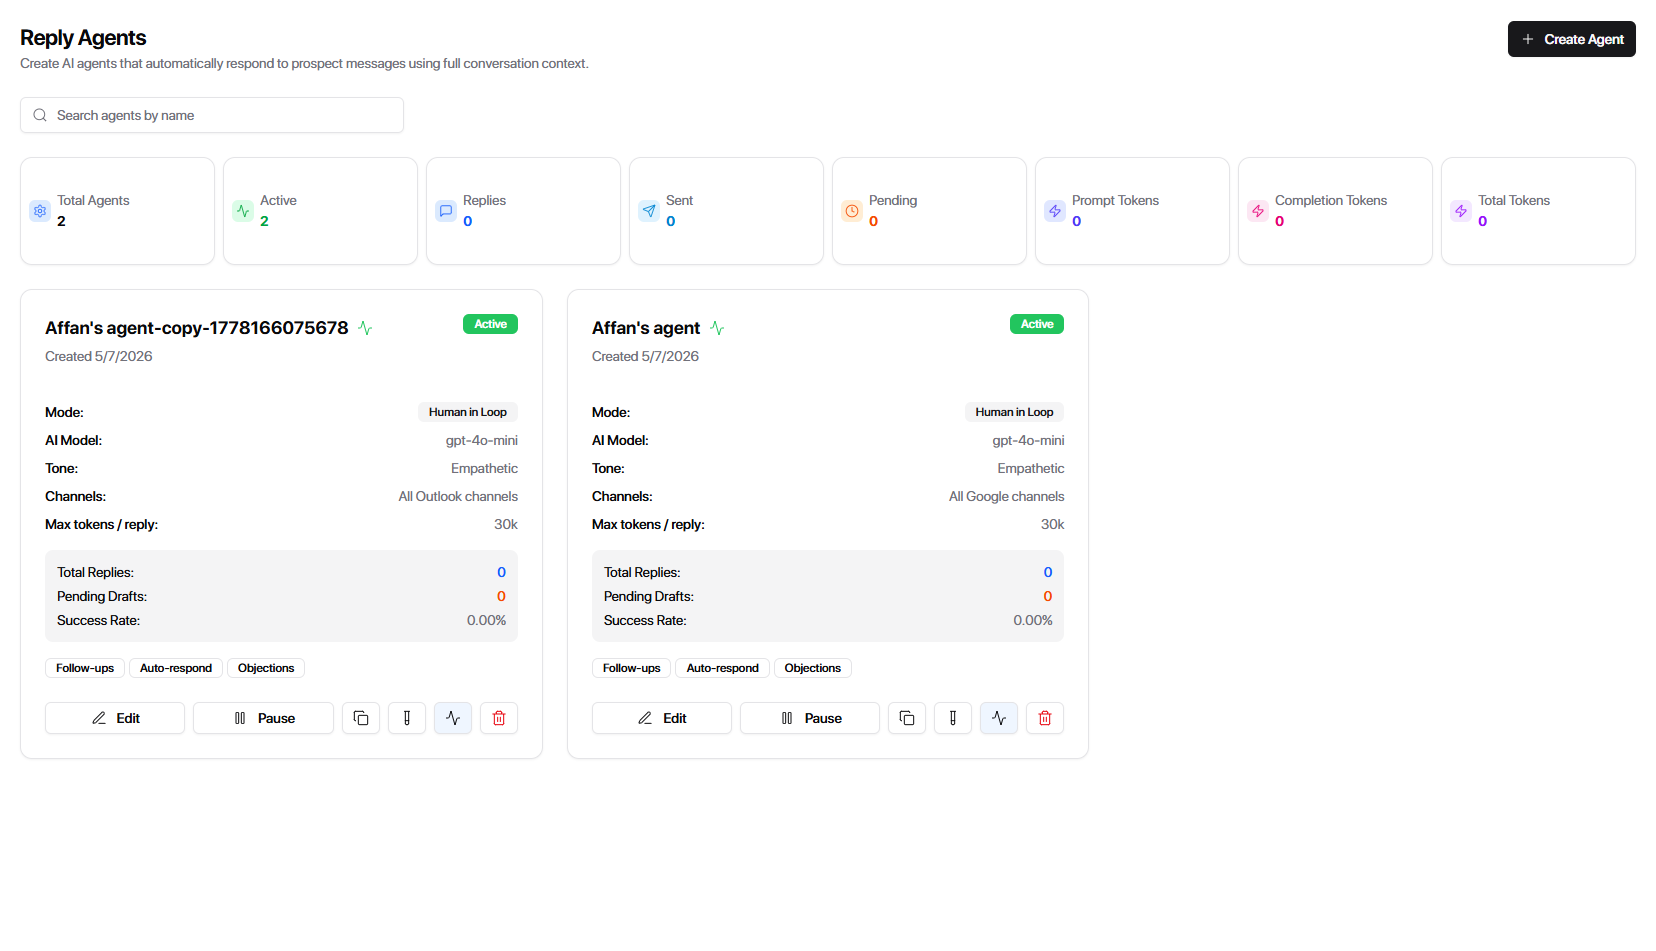
You'll see: "Agent clone successful."
The new cloned agent will now appear on your Reply Agents screen.
Why Clone a Reply Agent?
Cloning lets you create specialized agents quickly without rebuilding configuration from scratch. Common use cases include:
Multiple agents with different channel and label assignments: Create one agent for your outbound sales team and another for inbound leads, each operating on different channels.
Separate agents for LinkedIn and email: Clone your base agent and assign one to handle only LinkedIn DMs while another handles only email replies. This lets you tailor tone and response length to each channel's norms.
Cloning saves setup time and ensures consistency across agents while still allowing you to customize channel and label targeting for each one.
What's Next?
You've created your reply agent—now it's time to make sure everything works smoothly.